Manage shares with TrueNAS
Correctly share folders in the network under TrueNAS
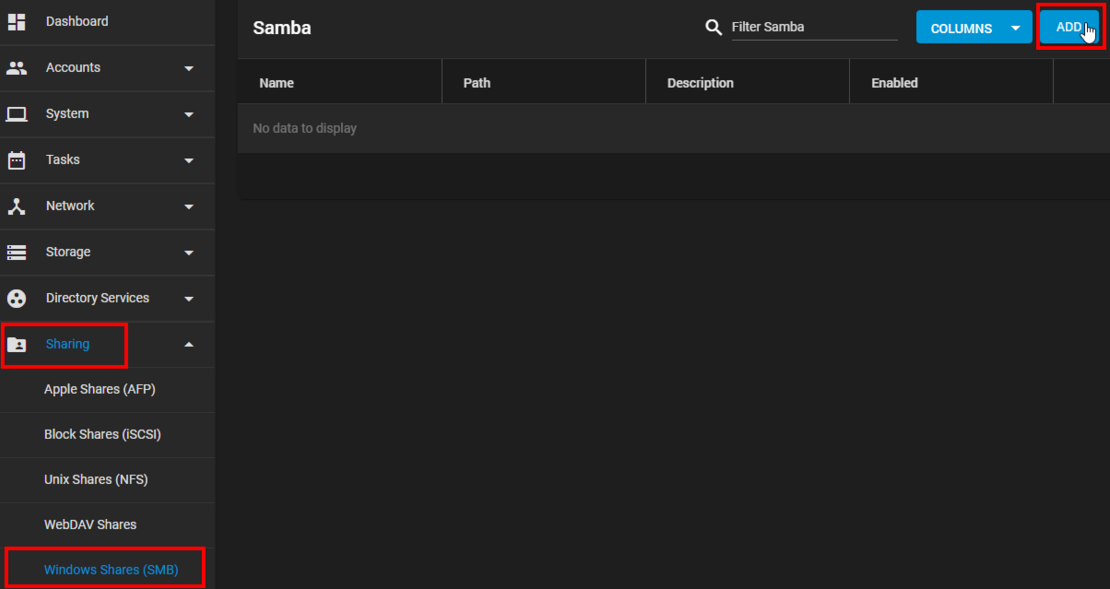
If you want to quickly share a folder in the internal network under TrueNAS, you will quickly find the menu item [Sharing > Windows Shares SMB] in the TrueNAS GUI.
The downside: Shares created in this way only offer limited configuration options. For example, quota settings and the creation of snapshots for the created share are missing.
But that doesn't have to be the case. If you carry out the following eight steps, you can fully configure your shares.
The right way to create a share under TrueNAS:
1.
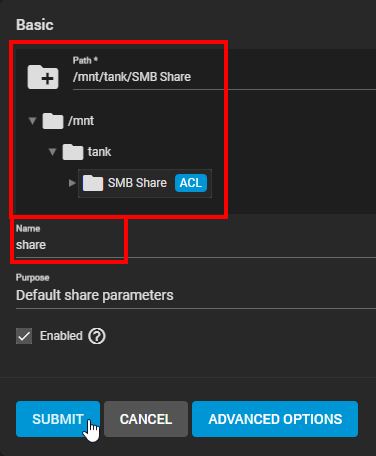
To gain control over a folder, you must create it as a dataset in the pool.
To do this, navigate to [Storage > Pools] and click on [Add Dataset] in the pool options.

2.
Enter the name of the dataset here and enter SMB as the "Share Type" for SMB shares. This setting of the "Share Type" to SMB helps to manage these configurations and settings correctly to ensure efficient and secure SMB sharing.
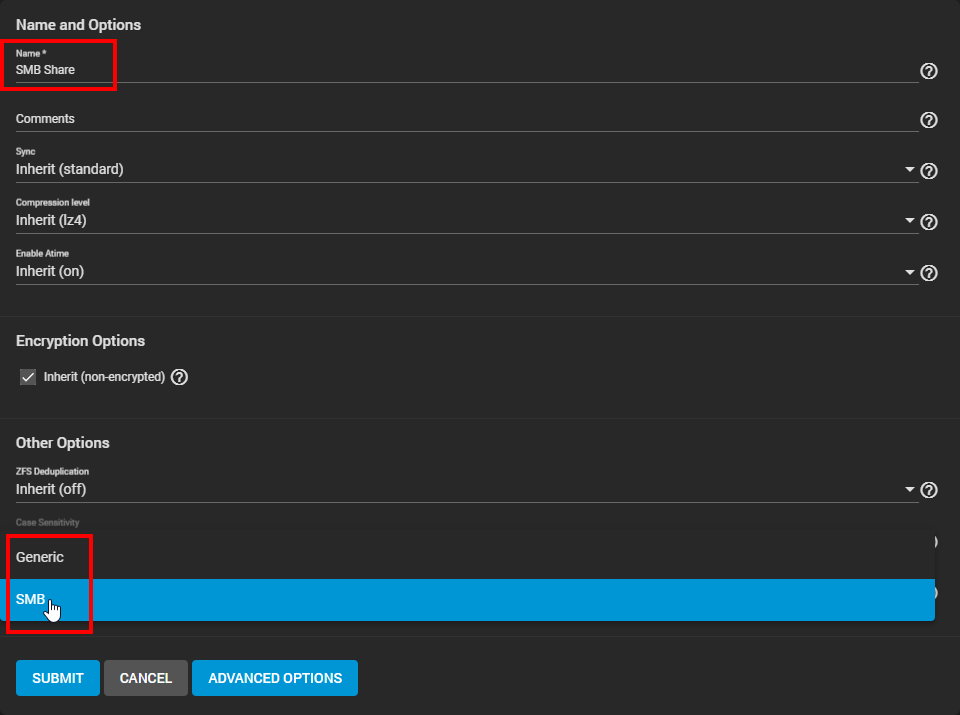
3.
After clicking on Submit, you have now created a new folder. You must then adjust the permissions to enable access in the network. To do this, navigate to "Edit Permissions" in the dataset created.
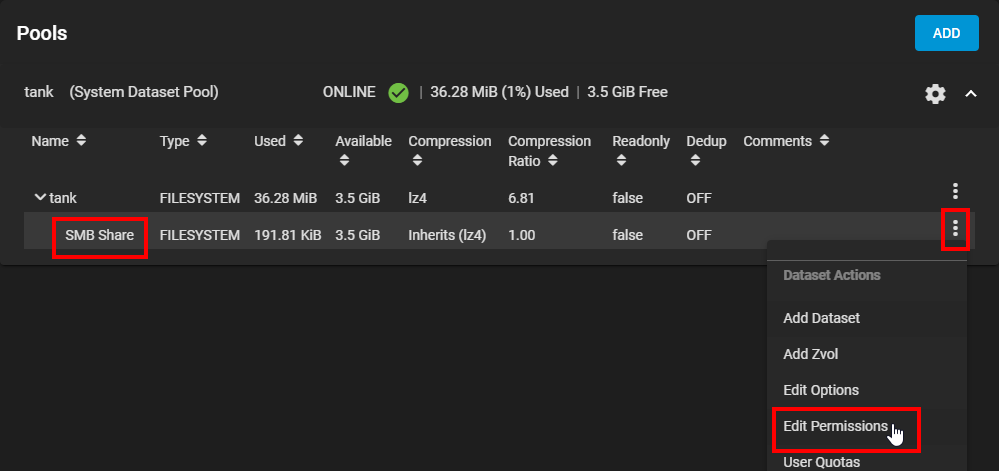
4.
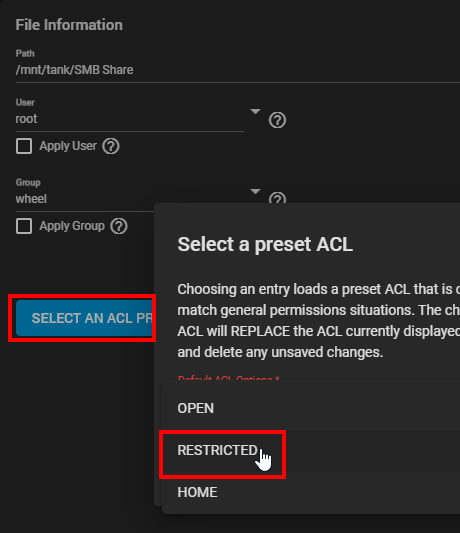
Under "Select a preset ACL" (Access Control List), set the rights to "Restricted".
5.
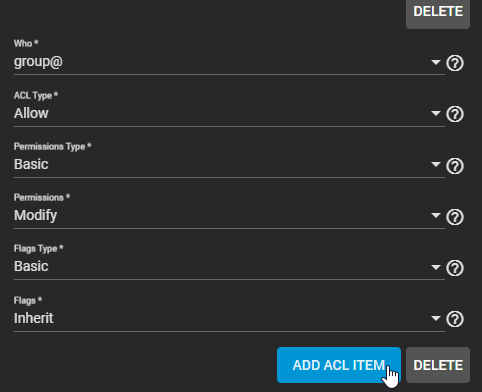
The system then creates a new ACL item with a click.
6.
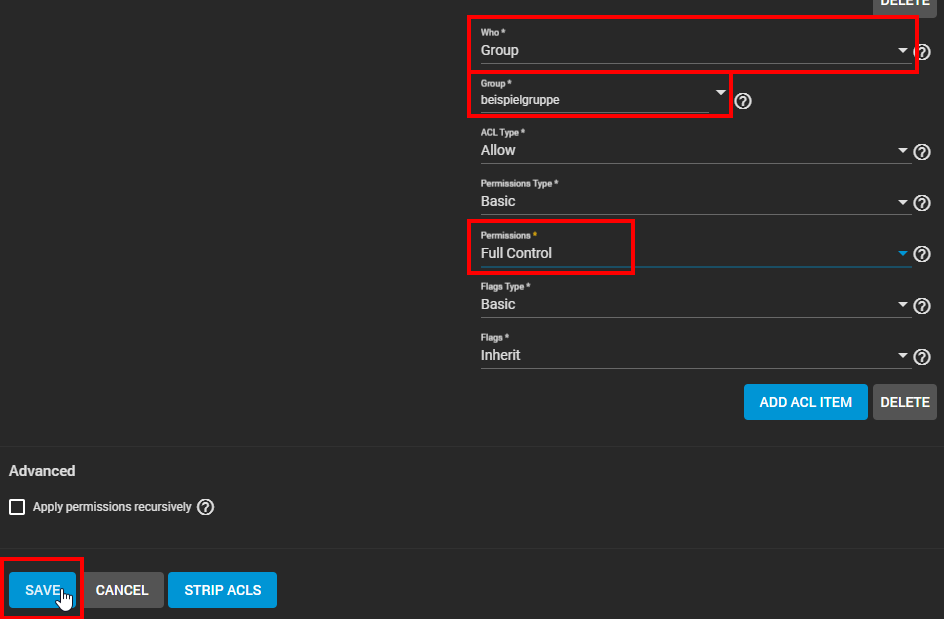
Assign the following information to the new ACL item:
- Do the rights apply to a group or to individual users?
- Specify which group or which users are granted access.
- Determine the rights level. Modify and Full Control can be used to edit files, for example.
7.
Now release the dataset created for the desired service/protocol. SMB is usually used for this in Windows networks.
