10 Steps to HDD swap under TrueNAS
Step-by-Step Guide to Replacing a Faulty Hard Drive in TrueNAS
To replace a faulty hard disk in FreeNAS/TrueNAS, you need to find out the serial number of the hard disk and its physical location/bay in the server.
1. Log in to the GUI > Storage > Pools. Click the gear icon on the top right > Status. This will take you to the Disks page.
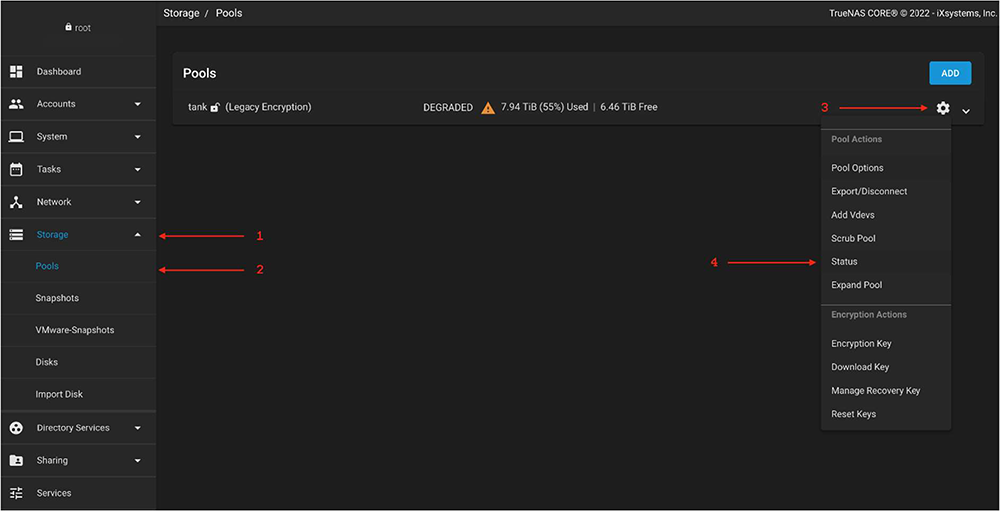
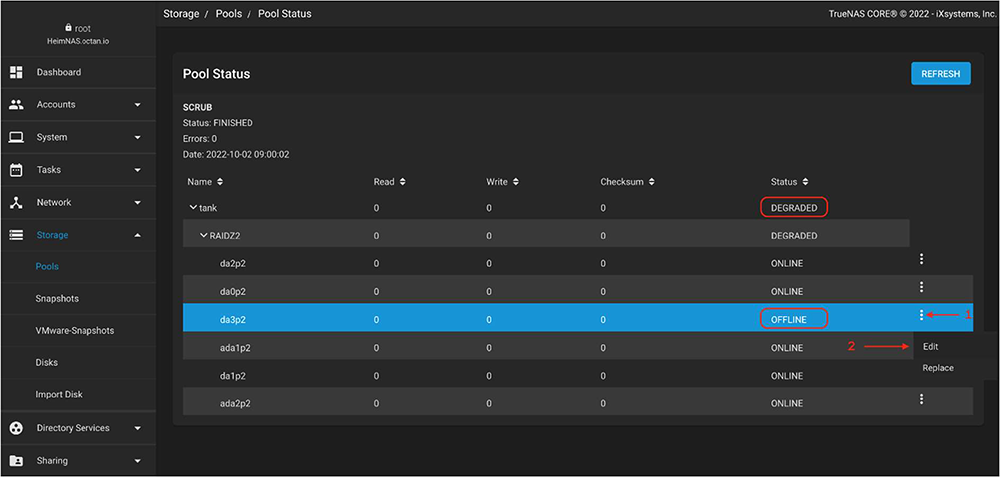
2. find the faulty hard disk on this page. It should have an OFFLINE or FAULTY tag next to it. Click on the three vertical dots on the right > Edit
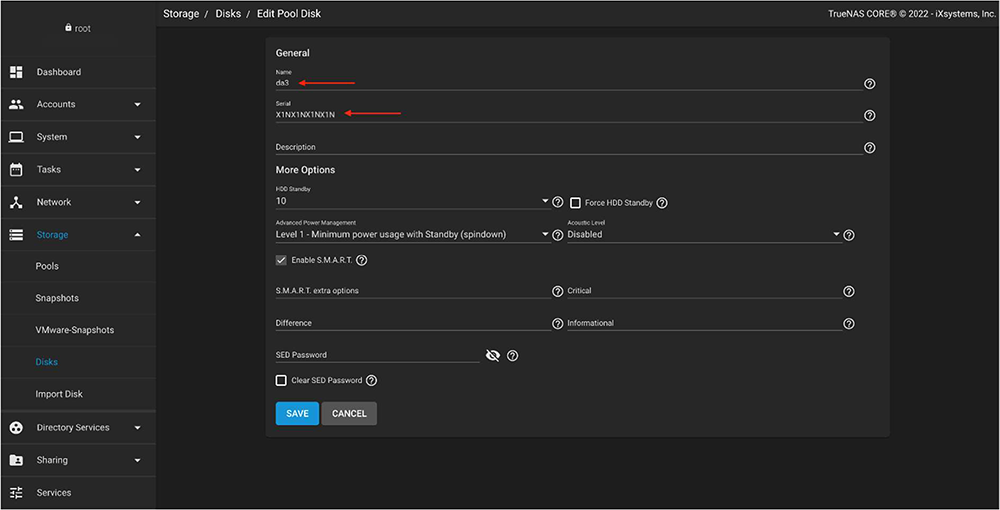
3. note the hard disk designation (e.g. da3, da2 etc.) and the serial number. In this example we use da3
4. Scroll down the left sidebar and click Shell, then type the following command and press ENTER:
smartctl -a /dev/da3 | grep -i serial
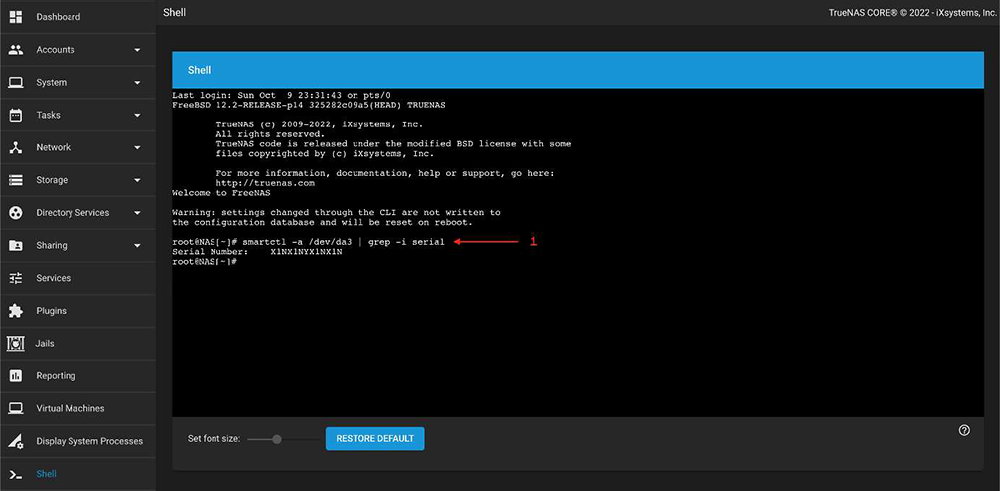
Check the output and make sure that the serial number in the shell window matches the one noted in step 3.
If the serial number matches, enter the following command and press ENTER:
sesutil locate da3 on
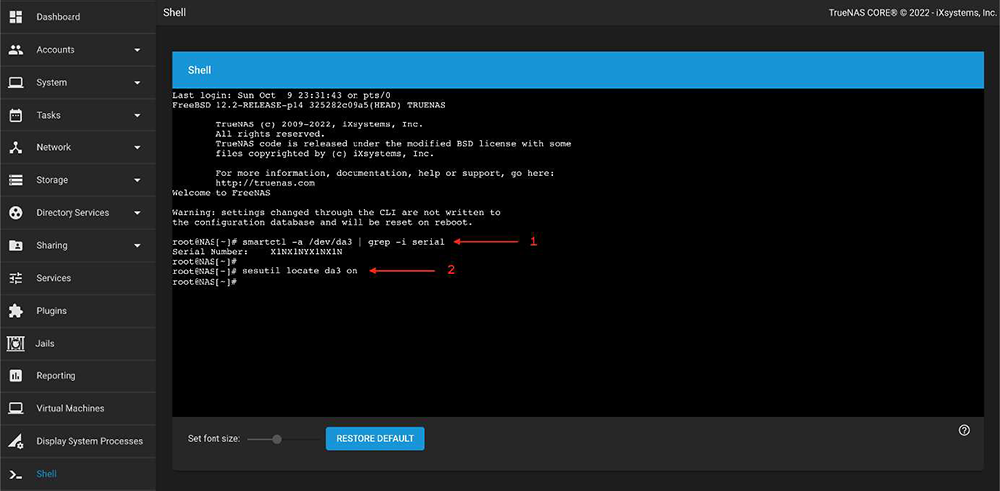
This command will cause the LED light on the affected hard drive to flash. Go to the physical server and highlight the tray where the hard disk is located. 5.
Go back to the GUI > Storage > Pool > Status > Hard Drive page and click on the three vertical dots > Offline. If you don't have an offline option, you should have a "Replace" option.
6. in the GUI, go to the shell, type the following command and press ENTER:
sesutil locate da3 off
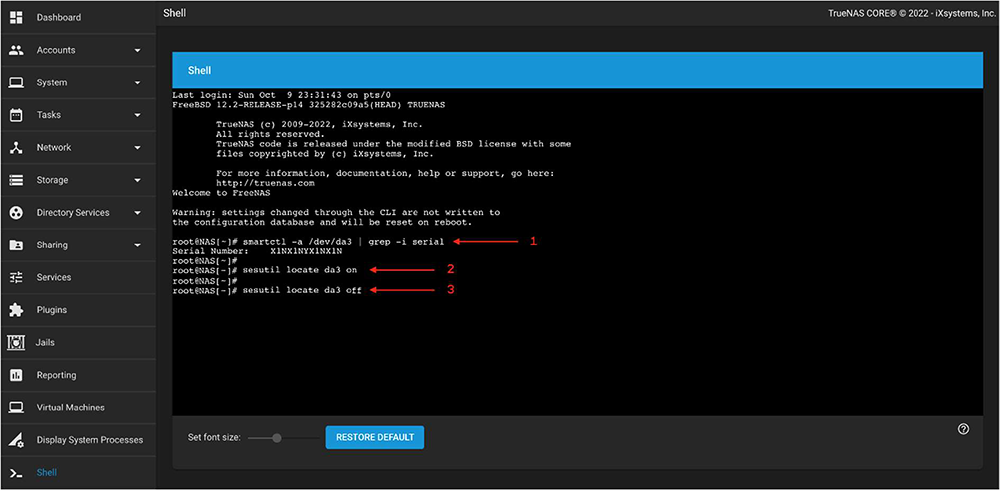
7. go to the physical server and pull out the affected hard disk. Place a new hard disk in the tray and plug it in.
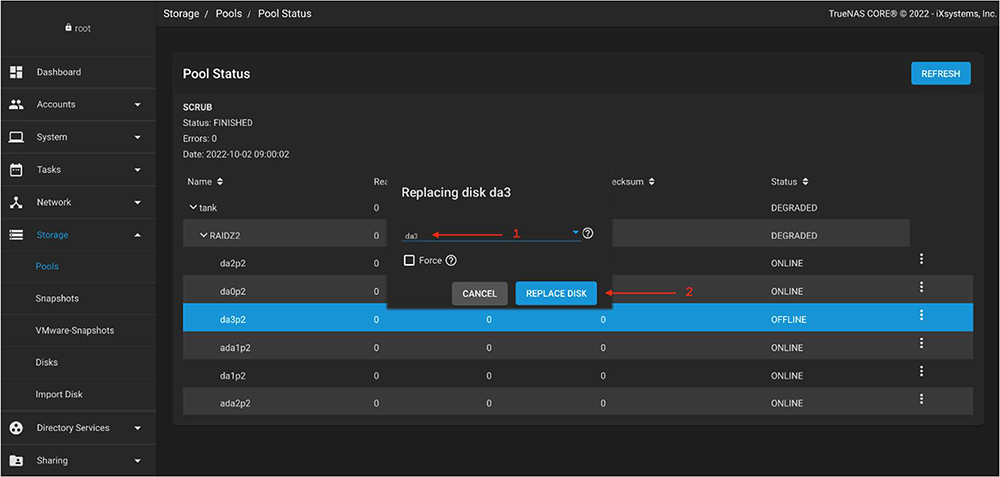
8. In the GUI, go to Storage > Pool > Status > Hard Disk Page and click on the three vertical dots > Replace. In the menu that pops up, select the new hard drive, check the "Confirm" box and click Replace.
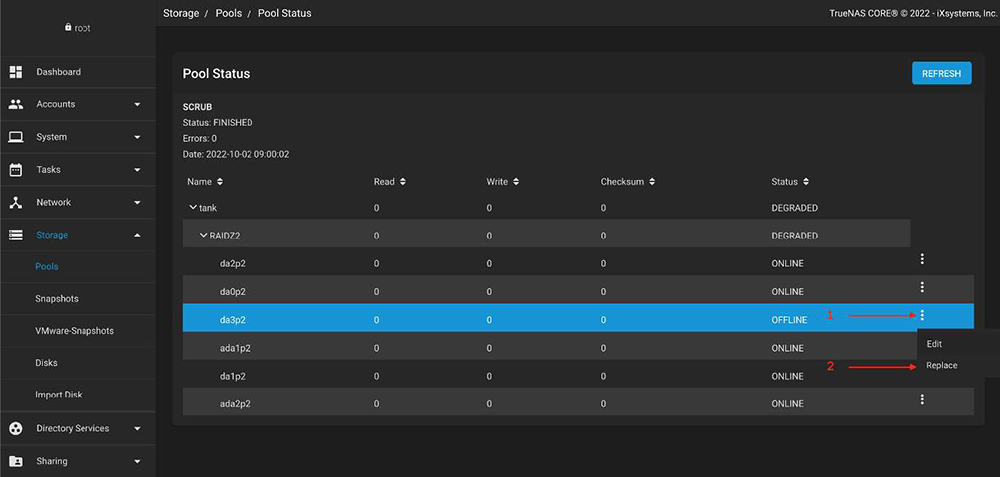
9. Select the new hard disk. (It is normal that the new hard disk gets the same identifier as the old one - in this case da3).
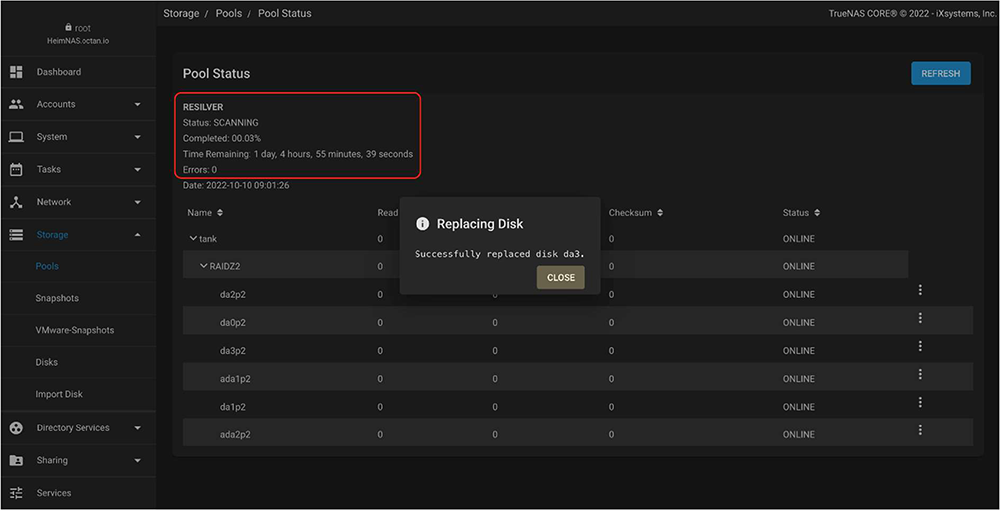
The initial estimate is usually high and tends to decrease dramatically as the resilvering process progresses. Please note that the speed of resilvering depends on several factors, such as your specific hardware configuration and the type and amount of data in your pool.
